DIY Emergency Light Circuit at Home – Easy Backup Light Project for Beginners
DIY Emergency Light Circuit at Home
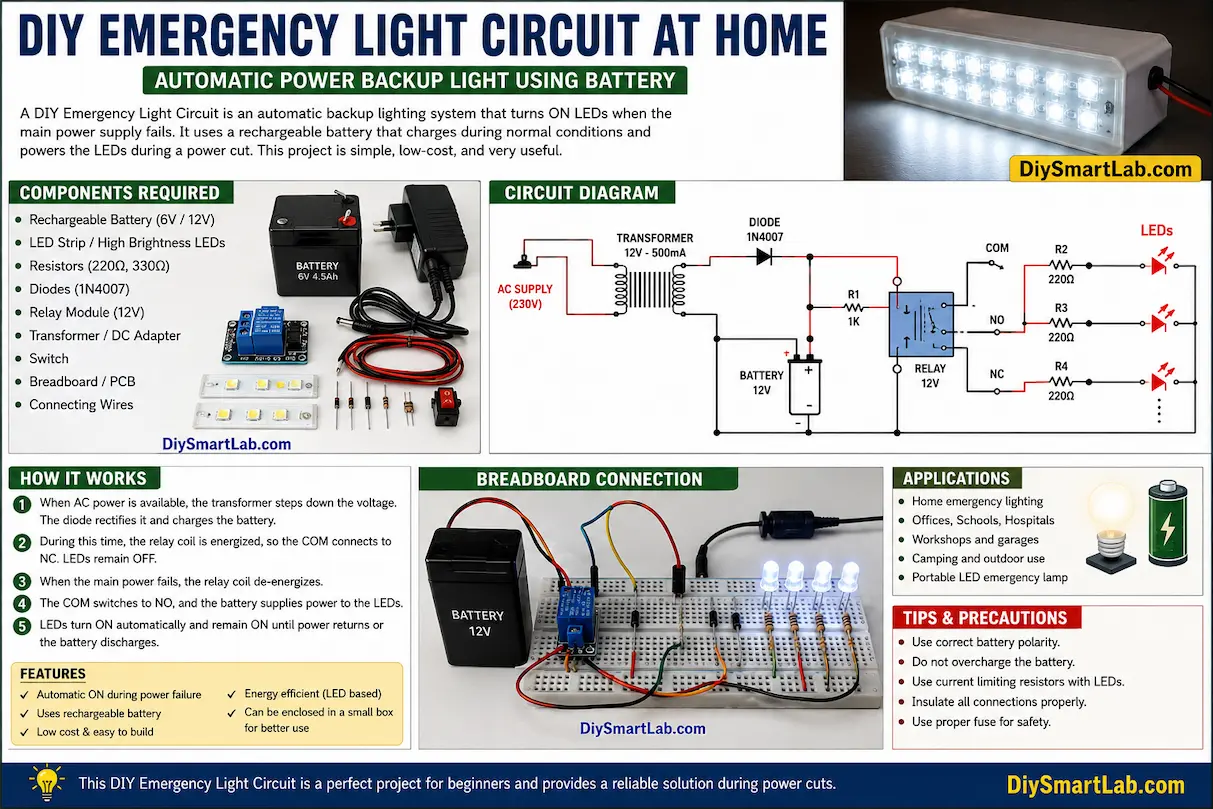
A DIY Emergency Light Circuit at Home is one of the most useful beginner electronics projects you can build. This simple circuit automatically turns ON LEDs during a power failure and provides backup lighting using a rechargeable battery. It is affordable, easy to make, and perfect for learning basic electronics.
In this detailed guide by DiySmartLab.com, you will learn how an emergency light circuit works, required components, circuit diagram explanation, battery charging basics, and practical applications.
What is an Emergency Light Circuit?
An emergency light circuit is an electronic system that automatically powers LEDs or lamps when the main electricity supply fails. The circuit usually uses a rechargeable battery that charges during normal power conditions and supplies power during outages.
Emergency lights are commonly used in homes, offices, schools, hospitals, and workshops to provide temporary lighting during blackouts.
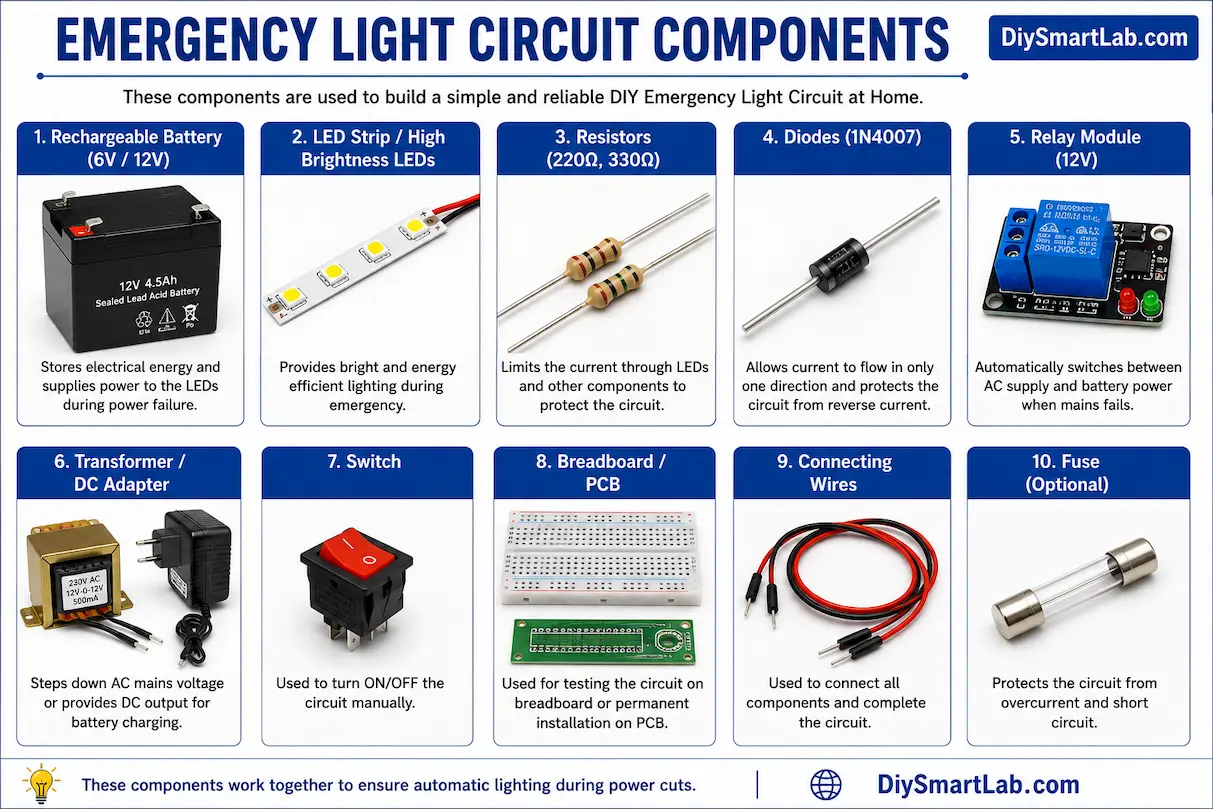
Components Required for DIY Emergency Light Circuit
- Rechargeable 6V or 12V Battery
- LED Strip or High Brightness LEDs
- Resistors (220Ω or 330Ω)
- Diodes (1N4007)
- Relay Module or Transistor
- Transformer or DC Adapter
- Switch
- Breadboard or PCB
- Connecting Wires
- Soldering Kit (optional)
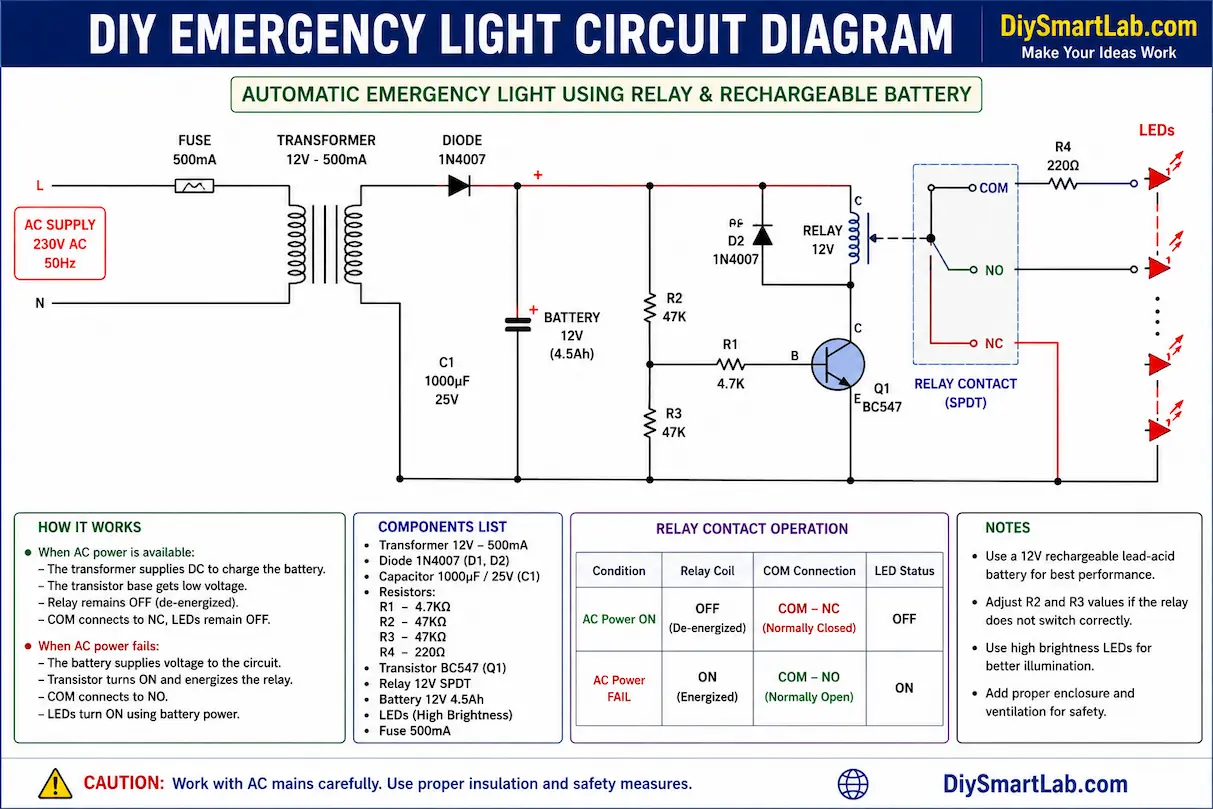
How DIY Emergency Light Circuit Works
The working principle of a DIY emergency light is very simple:
- When AC power is available, the battery charges through the charging circuit.
- The relay or transistor keeps the LEDs OFF during charging mode.
- When the main power fails, the relay switches automatically.
- The battery instantly powers the LEDs.
- The LEDs remain ON until power returns or the battery drains.
This automatic switching mechanism makes emergency light circuits highly reliable during power outages.
DIY Emergency Light Circuit Diagram
The circuit diagram below shows a simple automatic emergency light using LEDs, a rechargeable battery, and a relay.
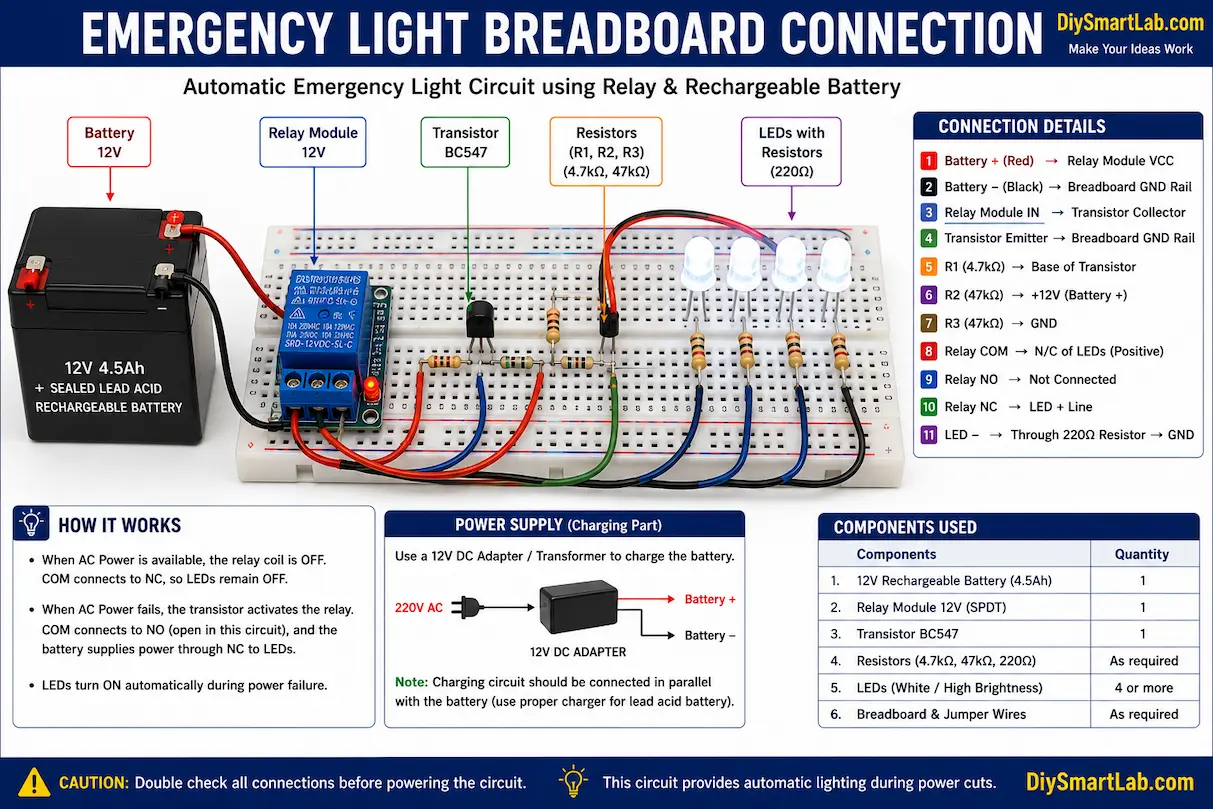
Step-by-Step DIY Emergency Light Connection
- Connect the rechargeable battery to the charging circuit.
- Connect LEDs in series or parallel with resistors.
- Use a relay for automatic switching between AC supply and battery.
- Connect the adapter or transformer for battery charging.
- Test the circuit by disconnecting the AC supply.
- The LEDs should automatically turn ON during power failure.
Battery Charging in Emergency Light Circuit
The rechargeable battery is one of the most important parts of the emergency light system. During normal electricity conditions, the battery stores energy through a charging circuit. During power cuts, the battery powers the LEDs.
Common battery types used:
- Lead Acid Battery
- Lithium-Ion Battery
- 18650 Rechargeable Cells
- NiMH Batteries
Advantages of DIY Emergency Light Circuit
- Low cost and easy to build
- Useful during power failures
- Energy efficient LED lighting
- Portable and rechargeable
- Excellent beginner electronics project
- Can be upgraded with solar charging
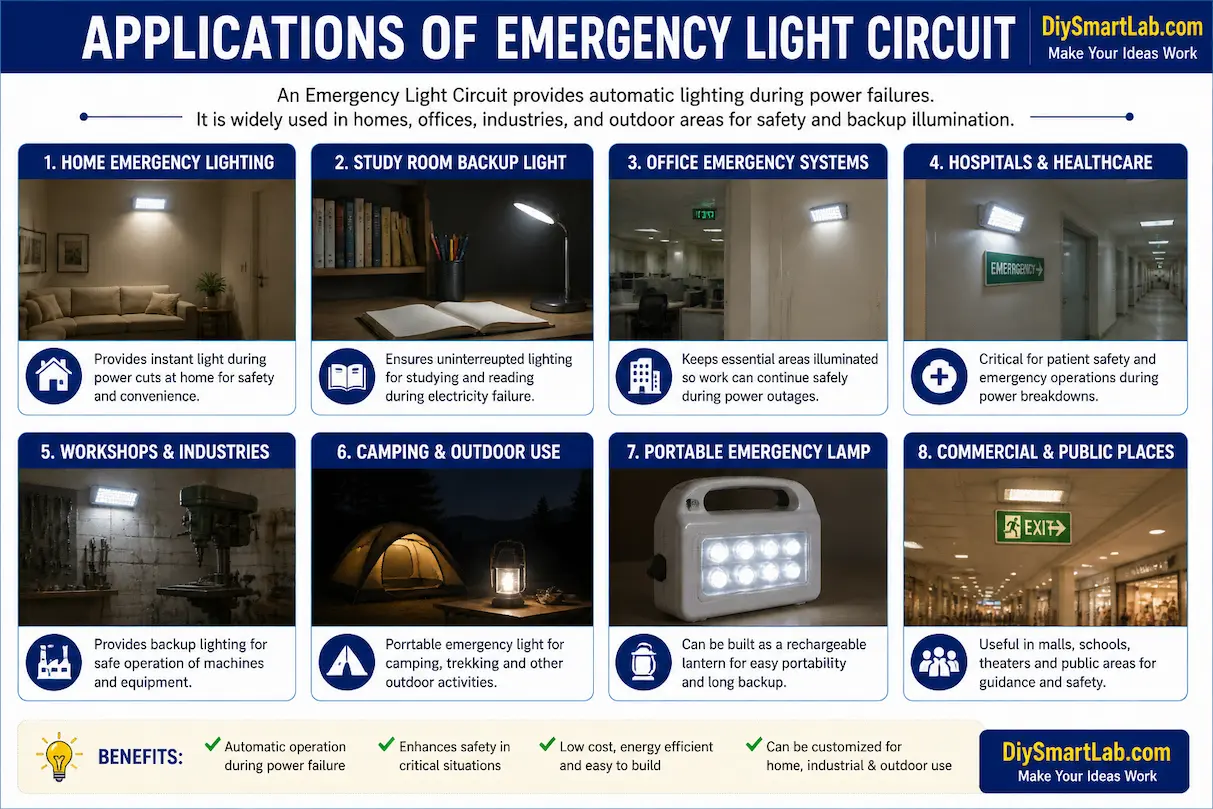
Applications of Emergency Light Circuit
- Home emergency lighting
- Study room backup light
- Office emergency systems
- Camping and outdoor lighting
- Workshop lighting backup
- Small rechargeable lantern projects
Safety Tips While Building Emergency Light Circuit
- Use proper battery polarity connections.
- Do not overcharge the battery.
- Use current limiting resistors with LEDs.
- Insulate exposed wires properly.
- Check voltage ratings before connecting components.
- Use a proper charging module for lithium batteries.
Conclusion
The DIY Emergency Light Circuit at Home is a practical and beginner-friendly electronics project that helps you learn battery backup systems, LEDs, relays, and power switching circuits. It is inexpensive, highly useful during blackouts, and can be improved further using solar panels or automatic charging systems.
Whether you are a beginner electronics enthusiast or a DIY hobbyist, this project is a great way to improve your circuit-building skills.
Frequently Asked Questions (FAQs)
What is the purpose of an emergency light circuit?
An emergency light circuit automatically powers LEDs during electricity failure using a rechargeable battery.
Which battery is best for DIY emergency lights?
Rechargeable lead-acid batteries and 18650 lithium-ion batteries are commonly used for DIY emergency light projects.
Can I build an emergency light without Arduino?
Yes, a simple emergency light circuit can be built using LEDs, relays, resistors, and rechargeable batteries without Arduino.
Why are LEDs used in emergency lights?
LEDs consume less power, produce bright light, and provide longer battery backup compared to traditional bulbs.
Can I add solar charging to this emergency light?
Yes, you can upgrade the project by adding a solar panel and solar charging controller.