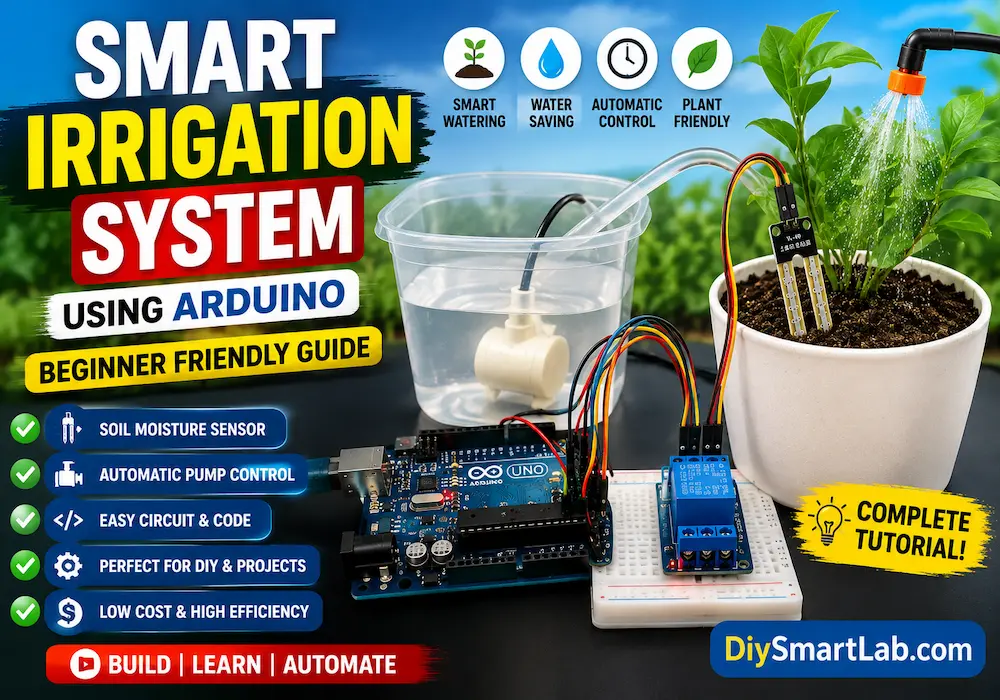
Smart Irrigation System Using Arduino – Beginner Friendly Guide
Smart Irrigation System Using Arduino – Beginner Friendly Guide
A Smart Irrigation System is an automated watering system that helps plants receive the right amount of water at the right time. Instead of watering plants manually every day, this system uses sensors and a microcontroller to monitor soil moisture and control a water pump automatically.
Today, smart farming and automated gardening are becoming very popular. Therefore, beginners and DIY electronics enthusiasts are learning how to build simple irrigation projects using Arduino and soil moisture sensors.
In this detailed guide by DiySmartLab.com, you will learn how a Smart Irrigation System works, its components, circuit explanation, working principle, applications, advantages, disadvantages, and Arduino project setup.
If you are new to electronics, this project is one of the best beginner-friendly Arduino projects to start with.
What is a Smart Irrigation System?
A Smart Irrigation System is an automatic plant watering system that uses sensors and controllers to detect soil moisture levels and water plants only when needed.
Unlike traditional irrigation methods, smart irrigation saves water and reduces human effort. The system continuously checks the moisture level in the soil. When the soil becomes dry, the water pump turns ON automatically. Similarly, when enough moisture is detected, the pump turns OFF.
Because of this automation, plants receive proper watering without wasting water.
Features of Smart Irrigation System
- Automatic watering system
- Uses soil moisture sensor
- Water-saving technology
- Low power consumption
- Beginner-friendly Arduino project
- Easy circuit setup
- Low-cost smart farming solution
- Can be upgraded for IoT monitoring
- Suitable for home gardens and farms
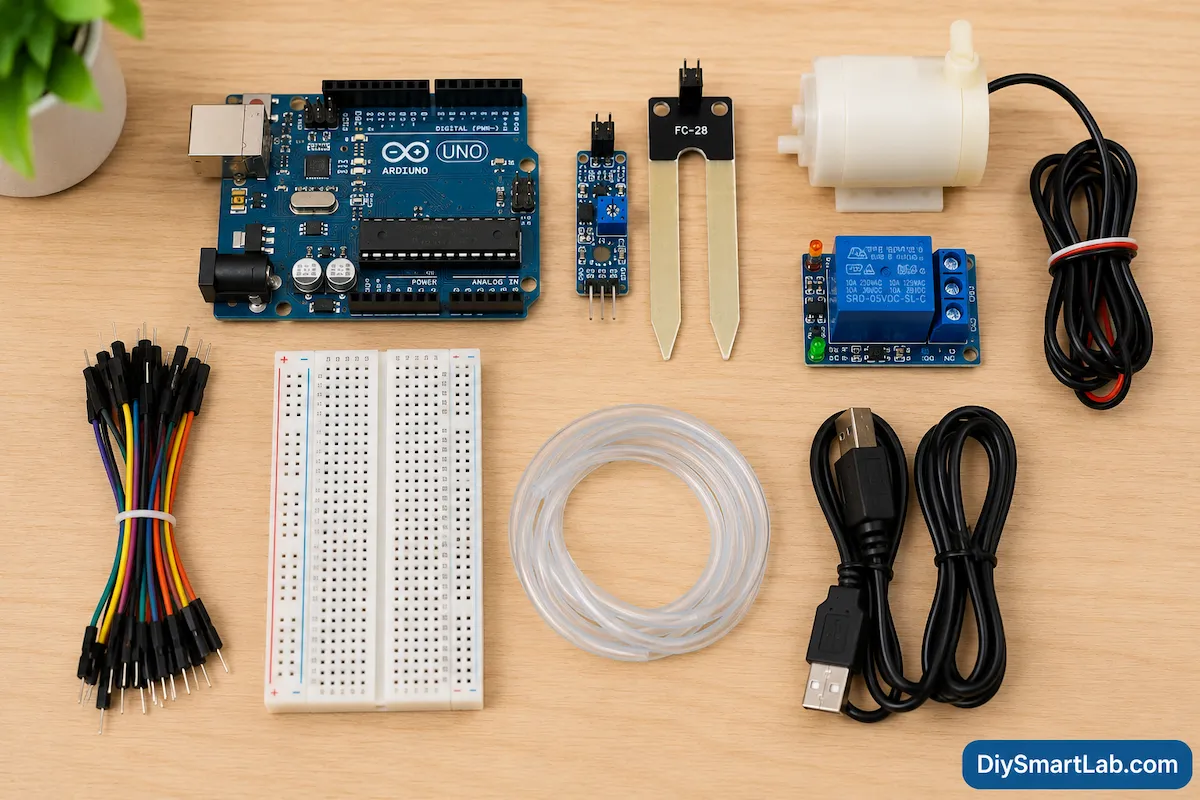
Components Required
You need a few basic electronic components to build this Smart Irrigation System.
| Component | Quantity | Description |
|---|---|---|
| Arduino Uno | 1 | Main microcontroller board |
| Soil Moisture Sensor | 1 | Detects moisture level in soil |
| Relay Module | 1 | Controls water pump |
| Mini Water Pump | 1 | Supplies water to plants |
| Jumper Wires | Several | Electrical connections |
| Breadboard | 1 | Easy circuit setup |
| Power Supply | 1 | Powers Arduino and pump |
| Water Pipe | 1 | Transfers water |
If you are new to electronics, you can also read our beginner guides on internal topics like Arduino Uno, relay modules, jumper wires, and breadboards on DiySmartLab.com.
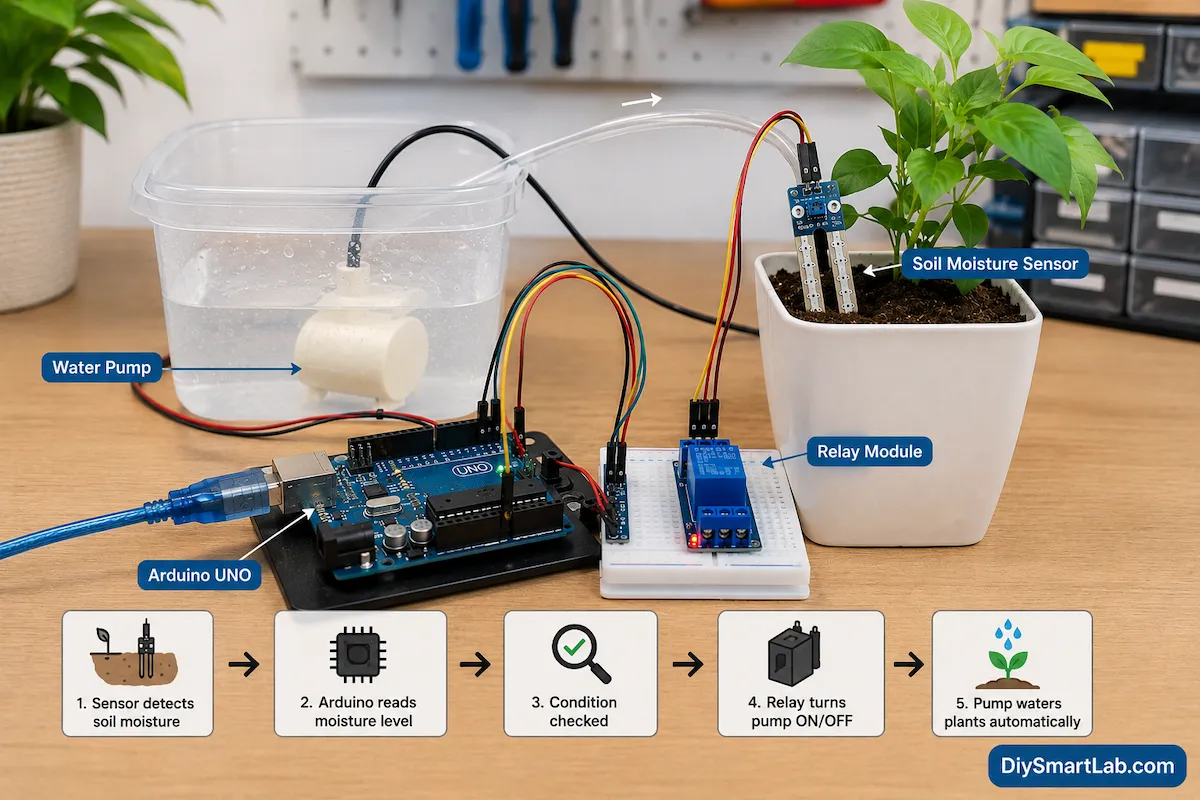
Arduino Smart Irrigation System Working Principle
The working principle of a Smart Irrigation System is very simple.
The soil moisture sensor measures the moisture level inside the soil. Then, the sensor sends data to the Arduino Uno.
After that, Arduino compares the moisture value with a predefined threshold value.
- If soil is dry → Water pump turns ON
- If soil is wet → Water pump turns OFF
The relay module acts like an electronic switch between the Arduino and the water pump.
As a result, the system waters plants automatically without manual operation.
Step-by-Step Working Process
- Soil moisture sensor detects soil condition
- Arduino reads sensor value
- Arduino checks moisture threshold
- Relay module receives signal
- Water pump starts automatically
- Plants receive water
- Pump stops when soil becomes wet
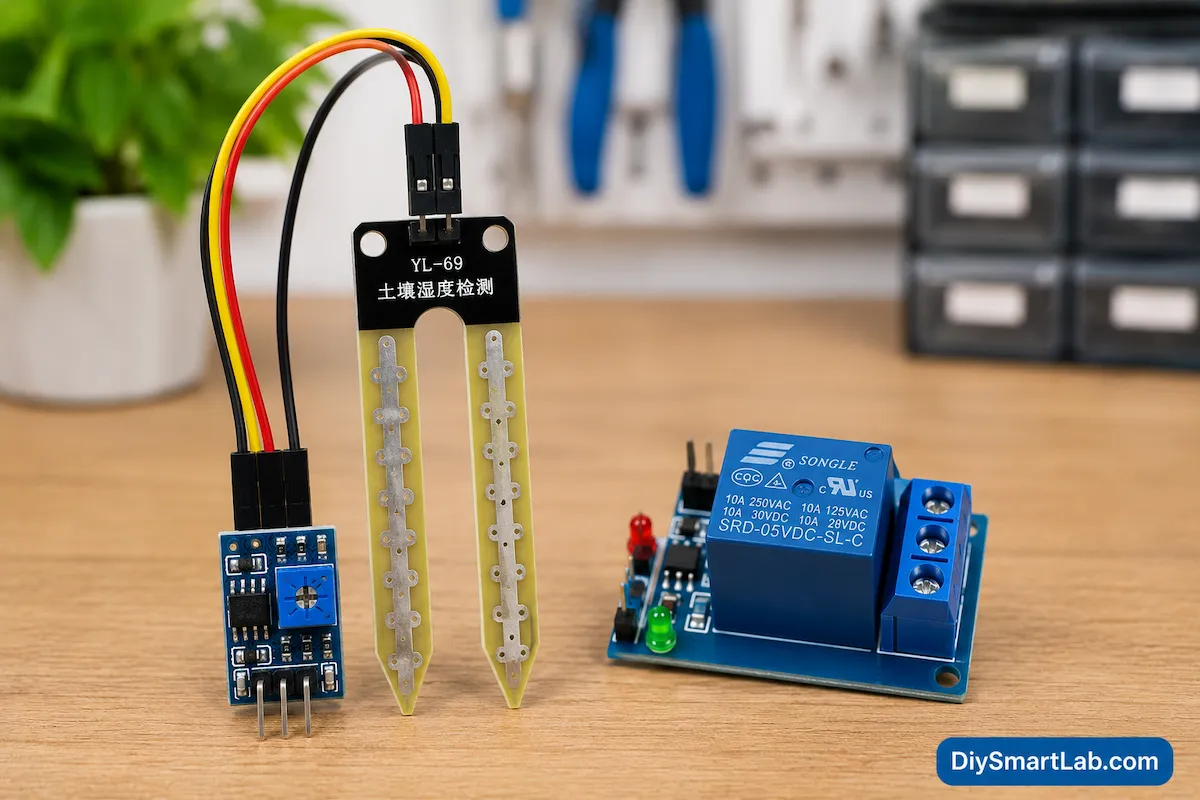
Soil Moisture Sensor Explained
The soil moisture sensor is the most important part of this project.
This sensor measures water content inside the soil. It has two metal probes that go into the soil. When moisture increases, electrical conductivity increases.
Similarly, when soil becomes dry, conductivity decreases.
The sensor converts this information into analog signals for Arduino.
Soil Moisture Sensor Pins
| Pin | Function |
|---|---|
| VCC | Power supply |
| GND | Ground connection |
| A0 | Analog output |
| D0 | Digital output |
You can also explore our detailed sensor guides on DiySmartLab.com to understand sensor basics more clearly.
Relay Module Explanation
The relay module controls high-voltage devices using low-voltage signals.
In this project, Arduino cannot power the water pump directly because the pump requires higher current. Therefore, the relay module works as a switch.
When Arduino sends a signal to the relay, the relay turns the water pump ON or OFF.
Relay Module Pins
| Pin | Function |
|---|---|
| VCC | Power supply |
| GND | Ground |
| IN | Control signal from Arduino |
| COM | Common terminal |
| NO | Normally Open |
| NC | Normally Closed |
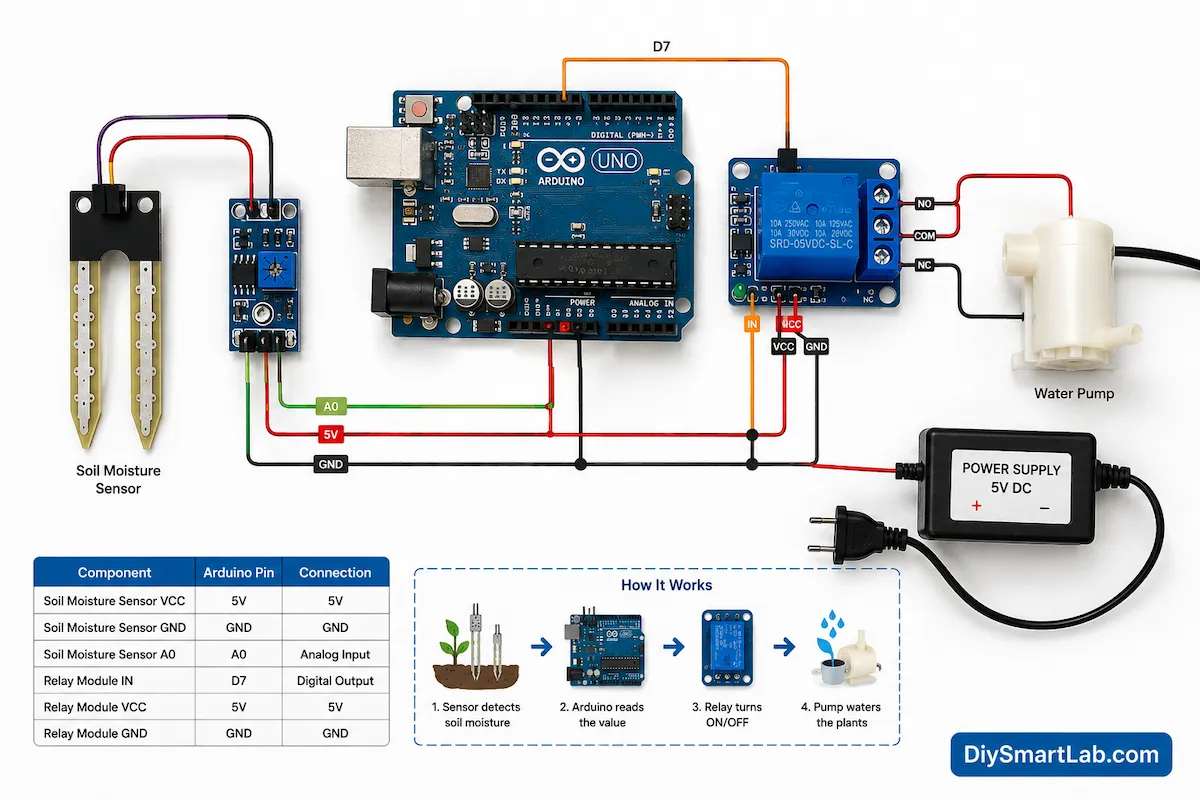
Smart Irrigation System Circuit Diagram
The circuit connection is very simple and beginner friendly.
Connection Details
- Soil sensor VCC → Arduino 5V
- Soil sensor GND → Arduino GND
- Soil sensor A0 → Arduino A0
- Relay VCC → Arduino 5V
- Relay GND → Arduino GND
- Relay IN → Arduino Digital Pin 7
- Pump connected through relay output terminals
Always check power supply ratings before connecting the water pump.
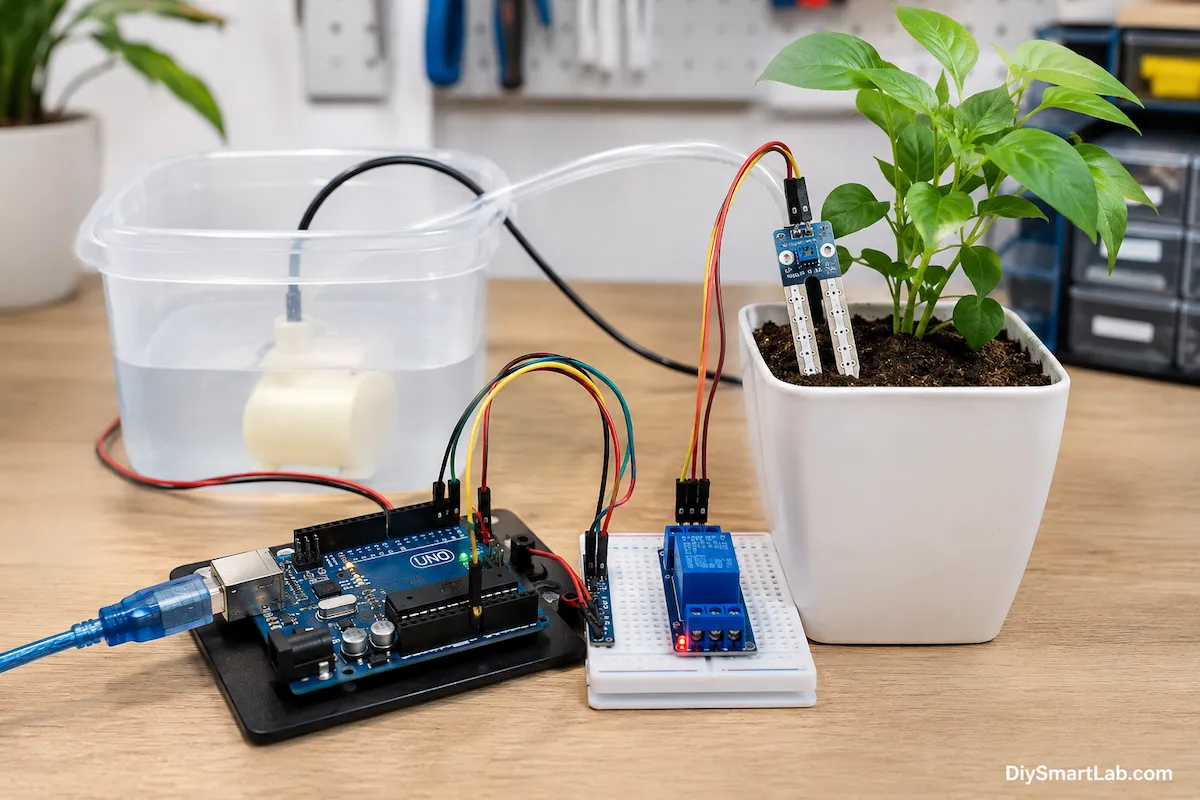
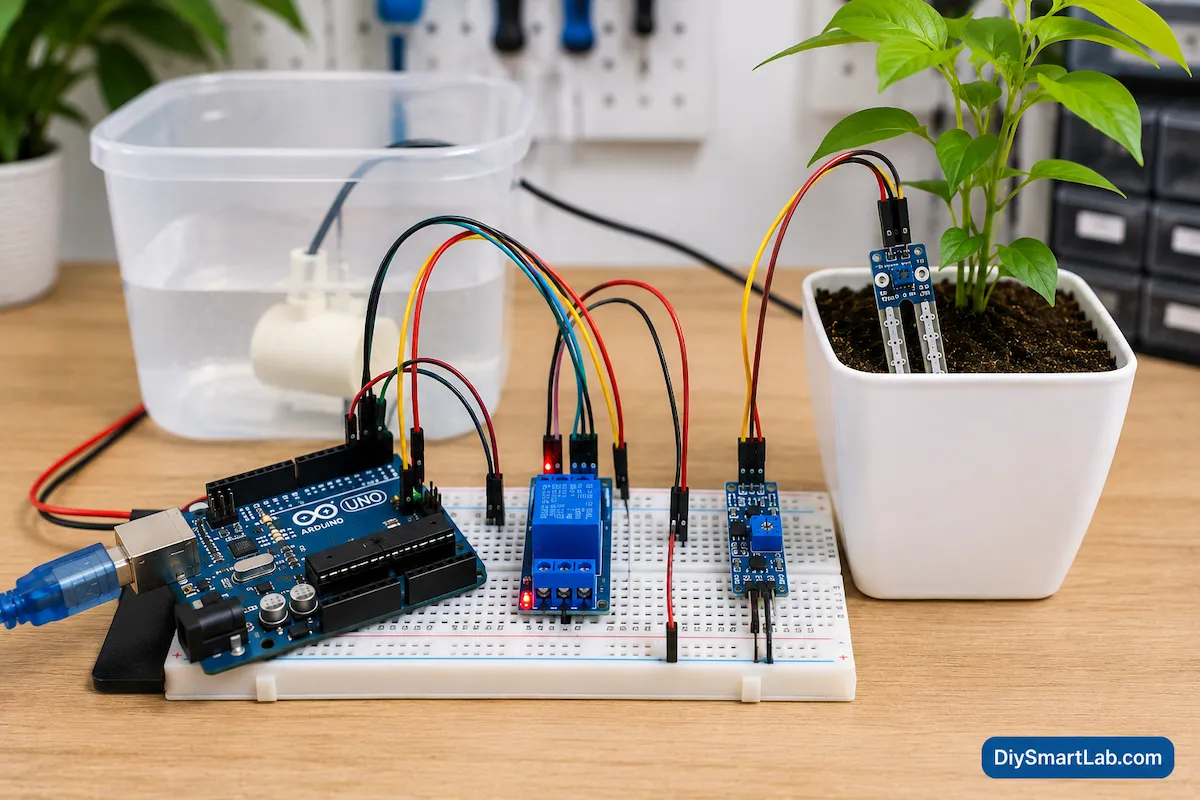
Smart Irrigation Breadboard Connection
Breadboard setup makes this project easier for beginners.
You can place Arduino, relay module, and sensor connections neatly on a breadboard using jumper wires.
Moreover, breadboard connections help during testing and troubleshooting.
Arduino Code Logic for Smart Irrigation System
The Arduino code continuously checks soil moisture values.
When the value crosses the dry threshold, Arduino activates the relay and starts the water pump.
Similarly, when moisture becomes sufficient, the relay turns OFF.
Basic Code Logic
- Read analog value from soil sensor
- Compare sensor value with threshold
- Activate relay if soil is dry
- Deactivate relay if soil is wet
You can later improve this project by adding:
- LCD display
- WiFi monitoring
- Mobile app control
- ESP32 IoT integration
- Rain sensor
- Automatic notifications
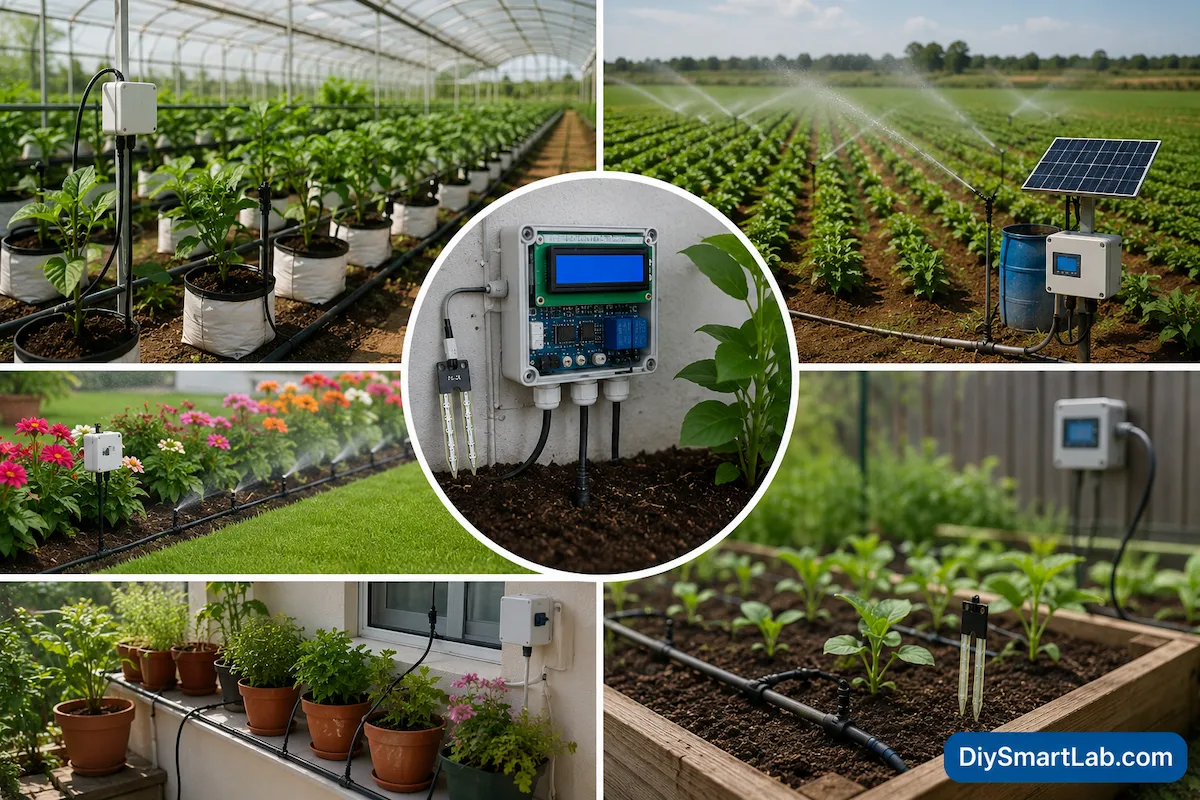
Applications of Smart Irrigation System
Smart irrigation systems are used in many areas.
Common Applications
- Home gardens
- Smart farming
- Greenhouses
- Agricultural fields
- Indoor plants
- Parks and lawns
- Terrace gardens
- Automatic watering systems
Nowadays, IoT-based smart agriculture systems are becoming very popular because they improve farming efficiency.
Advantages of Smart Irrigation System
- Saves water efficiently
- Reduces manual work
- Automatic plant watering
- Improves plant health
- Low maintenance
- Easy Arduino project for beginners
- Energy efficient system
- Low-cost automation project
- Supports smart farming
Disadvantages of Smart Irrigation System
- Requires power supply
- Sensors may corrode over time
- Water pump maintenance needed
- Initial setup cost
- Incorrect calibration can affect performance
Future Improvements for Smart Irrigation System
You can upgrade this project with advanced features.
Possible Improvements
- Add ESP32 WiFi module
- Control system using smartphone
- Add weather monitoring
- Use solar power supply
- Add LCD display
- Create IoT dashboard
- Use multiple moisture sensors
- Add automatic scheduling
If you are interested in IoT projects, you can also explore ESP32 projects and smart home automation tutorials on DiySmartLab.com.
Common Problems and Troubleshooting
Water Pump Not Working
- Check relay connections
- Verify power supply voltage
- Check pump wiring
Sensor Values Incorrect
- Calibrate sensor properly
- Clean sensor probes
- Check analog connections
Relay Always ON
- Check Arduino code logic
- Verify threshold values
- Check relay input pin
Why Beginners Should Build This Project
This project teaches many important electronics concepts.
For example, beginners learn:
- Arduino programming basics
- Sensor interfacing
- Relay control
- Automation systems
- Water pump control
- Breadboard wiring
- Smart farming technology
Because of its simplicity, this is one of the best Arduino automation projects for students and DIY hobbyists.
FAQs – Smart Irrigation System
What is a Smart Irrigation System?
A Smart Irrigation System is an automated watering system that waters plants based on soil moisture levels.
Which sensor is used in Smart Irrigation System?
A soil moisture sensor is commonly used to detect moisture levels in the soil.
Why is Arduino used in Smart Irrigation projects?
Arduino controls the sensor readings and automatically switches the water pump ON or OFF.
Can I build this project at home?
Yes. This project is beginner friendly and easy to build using basic electronic components.
Does Smart Irrigation save water?
Yes. It waters plants only when needed, which reduces water wastage.
Can I use ESP32 instead of Arduino Uno?
Yes. ESP32 can also be used and provides WiFi features for IoT applications.
Conclusion
A Smart Irrigation System is one of the best beginner-friendly Arduino automation projects. It helps save water, reduces manual work, and improves plant care.
Moreover, this project teaches important electronics concepts such as sensor interfacing, relay control, automation systems, and Arduino programming.
If you want to learn DIY electronics and smart automation projects, this Smart Irrigation System is an excellent starting point.
Keep visiting DiySmartLab.com for more Arduino projects, smart home automation tutorials, IoT guides, and beginner electronics learning resources.